XML-RPC Tunnel
Close a favorite back door of password attackers, and keep it open only for the tools you trust.
WordPress has a second entry point called XML-RPC, at /xmlrpc.php. Old publishing tools, some mobile apps, and some services use it to talk to your site. Attackers like it too: one XML-RPC request can try hundreds of passwords at once. Most login protection never sees these tries.
This add-on puts a guard in front of that door. You keep a short list of trusted addresses. They get in. Everyone else gets a 403 "no access" answer at once. So attackers lose an easy target, and your trusted tools keep working.
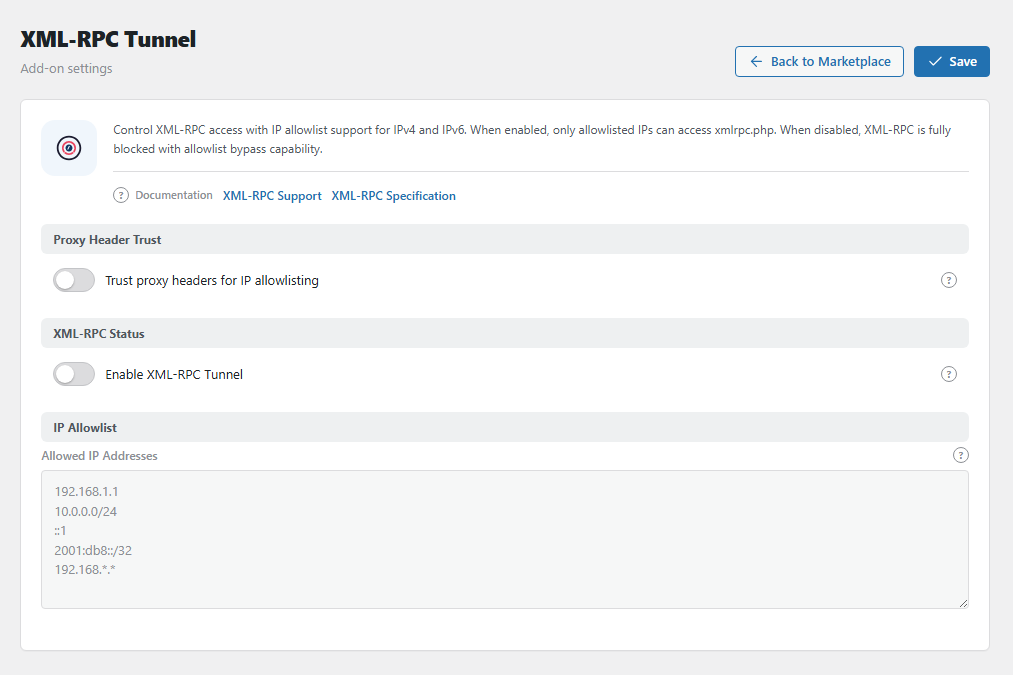
The XML-RPC Tunnel panel. Open it from BotBlocker → Add-ons.
The guard asks one question: are you on the list?
When the add-on is active, every request to /xmlrpc.php is checked. It does not matter if the tunnel switch is on or off:
- Is the address on your allowlist? Then it gets in.
- Is the address a trusted admin address in BotBlocker? Then it gets in too. So you do not need to keep the same list twice.
- Anyone else is refused with a 403 answer.
So with an empty list, nobody gets in. That is the safest state, and it is the right state for most sites.
The switch decides if WordPress answers
The Enable XML-RPC Tunnel switch does not change the list check above. It changes what WordPress itself does behind the guard:
- Off (default): BotBlocker also tells WordPress to turn off XML-RPC. WordPress then refuses every action that needs a login, for example "publish a post" from an app. Pingbacks (automatic notes from other blogs that link to you) are turned off too. So even an address on your list cannot really use XML-RPC.
- On: WordPress keeps XML-RPC working. Only addresses on your list get past the guard, and they can use XML-RPC normally.
Example: you use a desktop blog editor from your office at 203.0.113.10. Add that address to the list, and turn the switch on. The editor works from the office. A bot from anywhere else gets a 403 answer.
In both modes, BotBlocker also removes the X-Pingback header from your pages. This header tells everyone where your XML-RPC door is.
You see who tried
Every refused request goes to the BotBlocker log, with the address, browser name (user agent), and page. The reason says "XML-RPC is disabled" or "XML-RPC access restricted". So you can see who tried to connect.
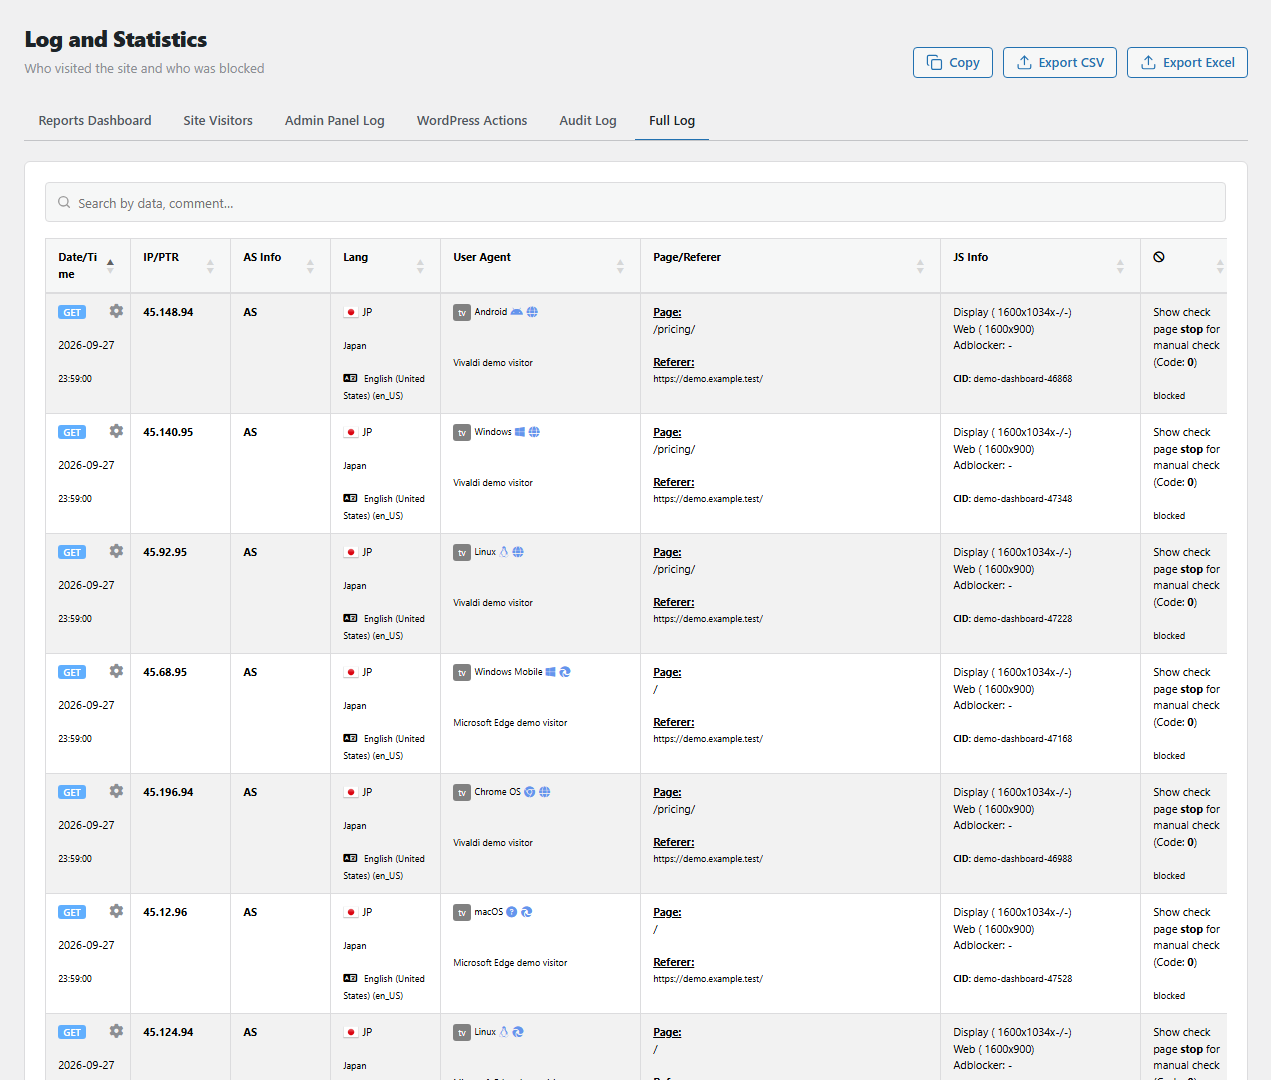
The Reports page shows the blocked XML-RPC requests. Open it from BotBlocker → Reports.
Settings
For most sites, the defaults are right: switch off, empty list. Change them only when a tool really needs XML-RPC.
Proxy Header Trust
Trust proxy headers for IP allowlisting
Default: Off
Your site can run behind a proxy or CDN, for example Cloudflare. A proxy or CDN is a service between the visitor and your server. Then your server sees the address of the proxy, not the address of the visitor. The proxy writes the real address in a note, called a header (X-Forwarded-For or CF-Connecting-IP).
- Off: the guard checks only the address that connects to your server.
- On: the guard also checks the address in these headers.
Example: your tool is at 203.0.113.10, and your site is behind Cloudflare. With this off, the guard sees a Cloudflare address, which is not on your list. The tool is refused. With this on, the guard sees 203.0.113.10, and the tool gets in.
Be careful: anybody can write these headers. Turn this on only when all visitors must come through your proxy, and the proxy writes over these headers. If visitors can reach your server directly, a bot can write your trusted address in the header and get in.
XML-RPC Status
Enable XML-RPC Tunnel
Default: Off
Decides if WordPress keeps XML-RPC working for the addresses on your list. Read The switch decides if WordPress answers.
- Off: XML-RPC is closed for everyone. Choose this if nothing on your site needs XML-RPC.
- On: XML-RPC works, but only for your list. Choose this if a tool needs it and you know the tool's address.
Turn it on only after you fill in the list. With the switch on and an empty list, the result is the same as off: nobody gets in.
IP Allowlist
Allowed IP Addresses
Default: empty
The addresses that can use XML-RPC. Write one entry on each line. You can use:
- one address, for example
203.0.113.10or2001:db8::10 - a range (CIDR), for example
203.0.113.0/24(256 addresses) or2001:db8::/32 - a wildcard for IPv4, for example
203.0.113.*. The*means "any number" in that part.
Text after # is a comment, so you can write a note, for example 203.0.113.10 # office editor. Lines that are not a valid address are ignored.
Keep the list short. Each address here can try passwords through XML-RPC without the guard.
If a tool stops working
- A tool stopped connecting? First, check that it uses XML-RPC. Most modern tools, and the WordPress block editor, use the REST API. This add-on does not change the REST API.
- The tool uses XML-RPC? Add its public address to Allowed IP Addresses, turn Enable XML-RPC Tunnel on, save, and try again.
- The address is on the list, but the tool still fails? Check that the switch is on. When it is off, WordPress refuses actions that need a login.
- Your site is behind a CDN and the tool is still refused? Open BotBlocker → Reports and find the refused request (see Log and reports). If its address is a CDN address, turn on Trust proxy headers for IP allowlisting.
- The tool's address changes often? Ask the provider for a fixed range, and add that range.
- Services like Jetpack or the WordPress mobile app stopped working? They can need XML-RPC. Add their addresses, or ask the provider which ranges they use.
- XML-RPC is still closed with the switch on? Another security or speed plugin can also turn it off. Find that setting in the other plugin and turn it off.