Install BotBlocker
Your site can be protected in a few minutes.
You install BotBlocker like any other WordPress plugin. You do not need technical skills, a special server, or changes to your DNS. BotBlocker works inside WordPress, so it protects your site from the moment you activate it.
After activation, a short Setup Wizard opens. It applies good settings with a few clicks, so you do not have to go through every setting yourself.
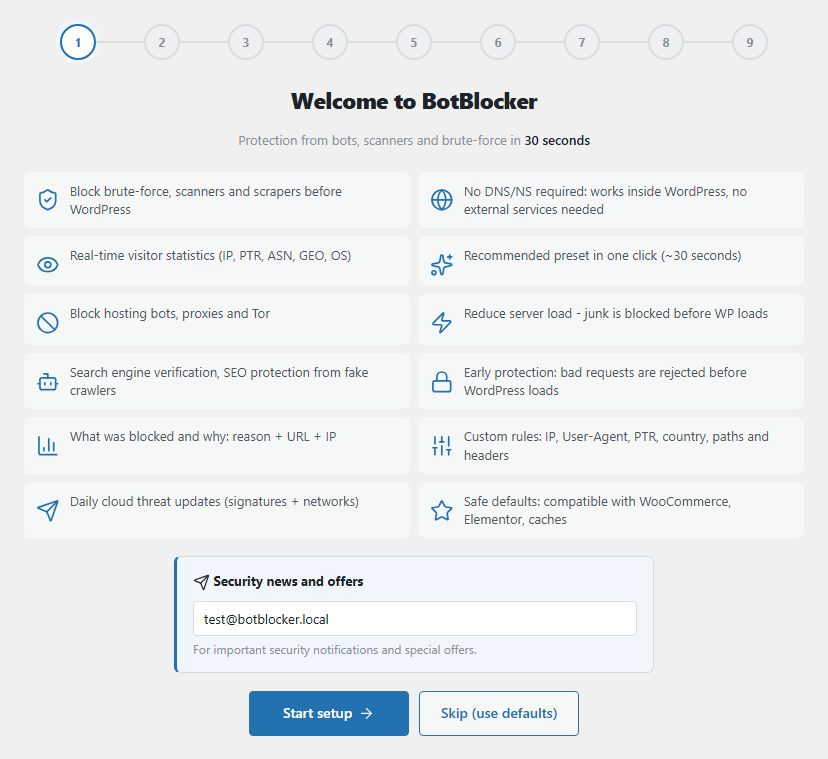
The Setup Wizard opens automatically after the first activation. Later, open it from BotBlocker → Dashboard → Setup Wizard.
What your site needs
- An administrator account on your WordPress site.
- WordPress 5.9 or newer, and PHP 7.4 or newer.
Most hosting plans meet these needs. If your site is too old, WordPress does not activate BotBlocker and tells you what to update. In that case, ask your hosting provider or the person who manages your site for help. Hosting and compatibility lists everything that BotBlocker uses from your host, and what it does when something is missing.
Install it from WordPress
Most site owners use this method, and we recommend it. WordPress downloads and installs the plugin for you.
- Sign in to WordPress as an administrator.
- In the menu on the left, go to Plugins → Add New Plugin.
- In the search box, type BotBlocker Security.
- Find BotBlocker Security in the results, and click Install Now.
- When the button changes, click Activate.
BotBlocker now appears in your WordPress menu, and the Setup Wizard opens. You can also read about the plugin on its WordPress.org page.
Install it from a ZIP file
Use this method if you got the BotBlocker ZIP file from us, or if your site cannot search the plugin directory.
- Keep the ZIP file as it is. Do not unzip it.
- In WordPress, go to Plugins → Add New Plugin.
- Click Upload Plugin at the top of the page.
- Click Choose File and select the BotBlocker ZIP file.
- Click Install Now.
- When WordPress tells you that the installation is complete, click Activate Plugin.
WordPress explains this method in more detail in Manage plugins.
Install it by hand, on the server
Use this method only if the upload form does not work on your site, for example because of an upload size limit. You need access to your server files, through FTP or your hosting file manager. If someone else manages your hosting, send them these steps.
- Unzip the BotBlocker ZIP file on your computer.
- Upload the
botblocker-securityfolder into thewp-content/plugins/folder on your server. - In WordPress, go to Plugins.
- Find BotBlocker Security and click Activate.
After you activate
When you activate BotBlocker for the first time, WordPress takes you to the Setup Wizard. Select a protection level, check that your pages still work, and make sure that you and your own server stay trusted. Each step saves when you click Continue. The Setup Wizard page explains each step.
In a hurry? Click Skip (use defaults). BotBlocker applies Balanced protection, the recommended level, and takes you to the Dashboard. You can open the wizard again at any time with the Setup Wizard button on the Dashboard.
Then continue to Get started with BotBlocker. It shows you how to read your Dashboard, and where to go when you want to change something.
When the installation does not work
- WordPress says that your PHP or WordPress version is too old? Update WordPress, or ask your host to switch to a newer PHP version. Then activate BotBlocker again.
- The upload fails, or the file is too large? Your host limits the upload size. Use Install it by hand, on the server, or ask your host to raise the limit.
- WordPress says "The package could not be installed"? You probably uploaded an unzipped folder, or a ZIP file inside another ZIP file. Upload the original BotBlocker ZIP file.
- The Setup Wizard did not open? That is not a problem. Go to BotBlocker → Dashboard and click Setup Wizard.
- A notice says that BotBlocker cannot write its files? BotBlocker still works, but your host must allow it to write to
wp-content/uploads/botblocker/. See Hosting and compatibility.