Setup Wizard
Good protection in a few clicks, without learning every setting first.
BotBlocker has many settings, and a new user does not know which ones matter for their site. A small blog, an online shop, and a busy company site all need different protection. If you change settings one by one, it takes time, and it is easy to forget something important, such as access for your own server.
The Setup Wizard solves this. It asks you a few simple questions, one step at a time. Each answer applies a group of related settings for you. At the end, you get a short summary and a protection score. You can change every choice later on the Settings page.
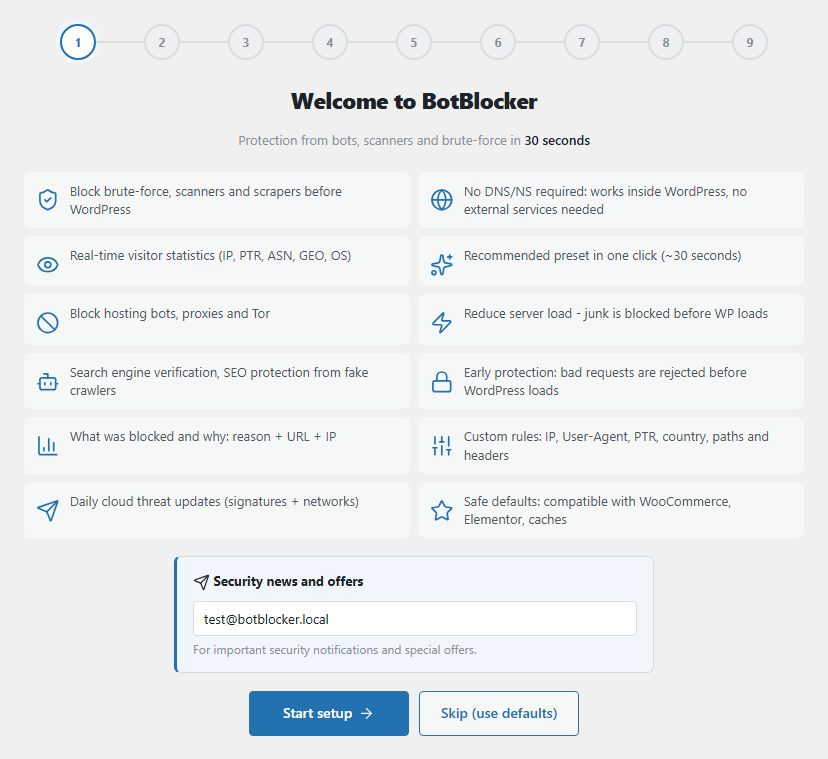
The Welcome step of the Setup Wizard. Open the wizard from BotBlocker → Dashboard → Setup Wizard.
It opens on its own the first time
When you activate BotBlocker for the first time, WordPress takes you to the wizard automatically. After that, it does not open by itself again. To open it later, go to BotBlocker → Dashboard and click the Setup Wizard button in the top banner.

The Dashboard, with the Setup Wizard button highlighted.
The wizard is also available from the Settings page. Click One-click setup, and then Guided Setup. See Find help for a specific problem.
The nine steps
Each step saves its choice when you click Continue, not at the end. So if you stop halfway, the steps that you finished stay applied. Back takes you to the previous step, and it does not undo a saved choice.
1. Welcome to BotBlocker
This screen shows what BotBlocker does. Want security news and offers? Enter your email. BotBlocker fills in your WordPress email for you, and gets it only when you finish the wizard. No emails wanted? Leave the field empty.
Click Start setup to begin. Or click Skip (use defaults) to apply the recommended level and go straight to the Dashboard (see Settings below).
2. Choose protection level
This is the most important step. A protection level is a ready-made group of settings. It changes many things at once: which bot signs BotBlocker checks, how long it blocks bad visitors, and how strict rate limiting is.
- Balanced protection: the default level. It blocks simple bots and has almost no effect on visitors. It does not deny visitors without
Accept-Language, classic proxies, HTTP/1.0 clients or ad-blocker users, and it allows payment callbacks when WooCommerce is active. Rate limiting asks for a check at 60 requests per minute and blocks at 120. Skip (use defaults) applies this level. - Medium protection: Balanced plus checks for fake referrers, iframes, the referrer and the honeypot. Rate limiting asks for a check at 40 requests per minute and blocks at 80. Ad-blocker, anti-detect and Cloudflare-origin checks stay off, so privacy-minded audiences see fewer challenges.
- Strong protection: marked Strict. For sites under an active attack: it adds ad-blocker and anti-detect checks, Cloudflare-origin blocking and reverse-DNS anomaly detection. Rate limiting asks for a check at 30 requests per minute and blocks at 50. Keep an allowlist for APIs and clients without
Accept-Language. - Strong API protection: the same rules as Strong, plus empty
Accept-Languageis allowed, the user list is hidden and your admin IP is not auto-allowlisted. Choose it when the site has an API, a monitoring service or an MCP/automation client: such clients often send noAccept-Language, and Strong would refuse them. - Full protection: the strongest permanent level. It adds the cloud checks, VPN and Tor blocking, hosting-network blocking, and private-browsing checks. Rate limiting is stricter again: a check at 20 and a block at 30 requests per minute, measured over 10 minutes. You need an active PRO license for it. Without one, the card shows PRO only.
- Emergency protection: a temporary lockdown for an active attack. It repeats Full and tightens every limit: a check at 10 and a block at 20 requests per minute over 2 minutes, one-hour rate bans, 30- and 60-minute visitor bans, stricter login limits and server DDoS resilience. It also blocks VPN, Tor, hosting and private browsing. It needs PRO. BotBlocker restores the previous protection settings after six hours; applying another preset or saving settings cancels that restore.
Click Apply preset to save your choice. Every level also turns protection on, if it was paused.
3. Compatibility check
BotBlocker now opens your homepage, your login page, and your site's REST API from your own server. A page passes when it answers normally. If a page does not answer, the step shows Minor compatibility issues detected.
The Admin panel line always shows as passed, because you are already in it.
Be aware of two things here:
- The test comes from your own server, not from a real visitor. A very strict rule can stop this test, even when the page works for your visitors. Read Where protection applies and Internal site connections if a test fails.
- If a test fails, click Manually to go on and fix the cause yourself, then adjust the related settings after the wizard.
4. Who always gets access?
This step makes sure that you do not lock yourself out. All three options are on by default.
- Allow administrator login: BotBlocker saves the address of each administrator who signs in, and trusts it. Your own visits then stay unblocked.
- Trust your current IP: BotBlocker adds the address that you use now to your allow list, with no end date. You can see and remove it in IP lists and proxies.
- Allow WordPress Cron and server requests: your own server can talk to your site without checks. Updates, scheduled tasks (WP-Cron), and backups continue to work. See Self connections.
If your address changes often (for example, on a mobile network), the first option helps more than the second.
5. Connect Google reCAPTCHA
This step is optional. Google reCAPTCHA is an extra layer next to BotBlocker's own check. Select one:
- No Google reCAPTCHA: use only BotBlocker's check. You can add Google later.
- Connect Google reCAPTCHA v2: a visible checkbox or challenge.
- Connect Google reCAPTCHA v3: an invisible score that runs next to your main check.
For v2 or v3, you need a Site key and a Secret key from Google. For v3, you can also set the Score threshold. See reCAPTCHA.
6. Choose primary BotBlocker verification
Here you choose what a visitor sees when BotBlocker needs more proof. Silent Auto-Verify (No Captcha) shows nothing to the visitor. The other options are short visible tasks: Color Buttons, BotBlocker Image Captcha, Dynamic Shape Captcha, Dynamic Digit Captcha, and Hold Button Captcha. You can also select a Google reCAPTCHA v2 mode here, if you connected v2 in step 5. Each option shows a short preview. See Challenge modes.
7. Initialization mode
This step controls how early BotBlocker starts on each request. The earlier it starts, the less work your server does for a bad bot.
- Regular plugin: the default. BotBlocker loads with your other plugins. It works on every site.
- MU-plugin: BotBlocker installs a small must-use plugin file, so it starts before your other plugins. Your IP block and allow lists then work earlier. Country blocking can work this early too, but you must turn it on. See Country blocking in the early layers.
- Early Init: BotBlocker checks your IP lists before WordPress loads at all. It can also block countries this early, when you turn that on. It needs an active PRO license and the Early Init add-on. Without them, the card shows PRO only or Addon required.
MU-plugin and Early Init write files on your server. Read Early phase and MU mode before you select them on a busy site.
8. Performance optimization
BotBlocker keeps short-term data, such as request counts. If your hosting has Redis or Memcached, BotBlocker can keep this data in memory, which is faster. BotBlocker checks which ones your server has and marks the others as not available. If you have neither, select No cache. BotBlocker then uses WordPress transients, which work on every host. See Cache backends.
This is the last step with a choice. Click Continue to save it, like on the other steps. The wizard is then finished.
9. Your site is protected!
The last screen shows a summary: your protection level, your verification, your start mode, and your protection score. From here, go to the Dashboard, Reports, Rules, or Settings.
What else happens when you finish
When the wizard finishes, BotBlocker marks setup as complete. If it finds a shop plugin on your site (for example, WooCommerce), it also turns on payment callbacks. Order confirmations from payment providers then always get through.
When you open the wizard again later, you see a short Setup completed screen. From there, go to the Dashboard or Settings, or click Reset and Re-run Wizard to see the steps again.
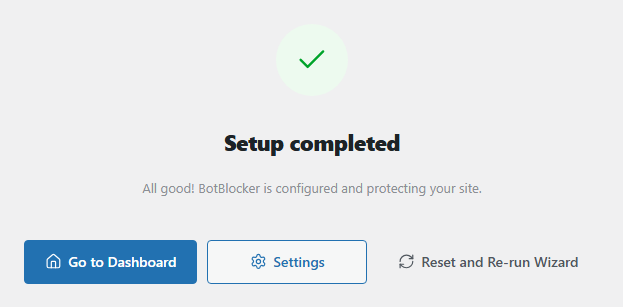
The Setup completed screen, when you open the wizard after you finished it.
Use it for big changes, not small ones
The wizard is good for your first setup, and when your site changes a lot: you open a shop, add a cache, move to a new host, or want a fresh start after many experiments.
Do not use it to change one setting. A protection level replaces a whole group of settings, so it can undo changes that you made with care. To change one thing, go to the Settings page and change only that setting. Before you run the wizard again, export your settings on the Tools page, so you can compare or restore them.
The wizard is also not a repair tool. A new level can hide the setting that caused a problem, but the cause stays. To find the cause, read Find help for a specific problem.
Settings
The wizard has three buttons that change your setup directly.
Apply preset
Default: Balanced protection is selected
Applies the protection level that you selected in step 2. Every setting in that level gets the level's value, so your own changes to those settings are replaced. Settings that are not part of the level stay as they are.
Skip (use defaults)
Applies Balanced protection and takes you straight to the Dashboard. BotBlocker asks you to confirm first. It is the same as Apply preset with the Balanced level, so it also replaces the settings in that level.
Skip does not run the other steps. The access options from step 4, the verification, the start mode, and the cache keep their current values. Skip also does not mark setup as complete.
Reset and Re-run Wizard
This button is on the Setup completed screen. After you confirm, BotBlocker forgets that setup is complete and shows the steps again. The button itself does not change any protection setting. But each step that you then continue through saves its choice again.
When something goes wrong
- A step shows an error and does not continue? Read the message. For example, Full protection or Early Init needs a license, or the Early Init add-on is off. Your earlier choice stays selected, so you can select another option.
- A compatibility test failed? Open that page in a private browser window. If it works there, a rule stops only the server's own test. Check Internal site connections and Where protection applies.
- You see only the "Setup completed" screen? Click Reset and Re-run Wizard.
- Part of your site stopped working after the wizard? Pause protection with the switch on the Dashboard (Pause protection). Then change the setting that caused it, or run the wizard again with Balanced protection.
- Locked out after you changed the start mode? Use your secret links. See Emergency recovery secrets.